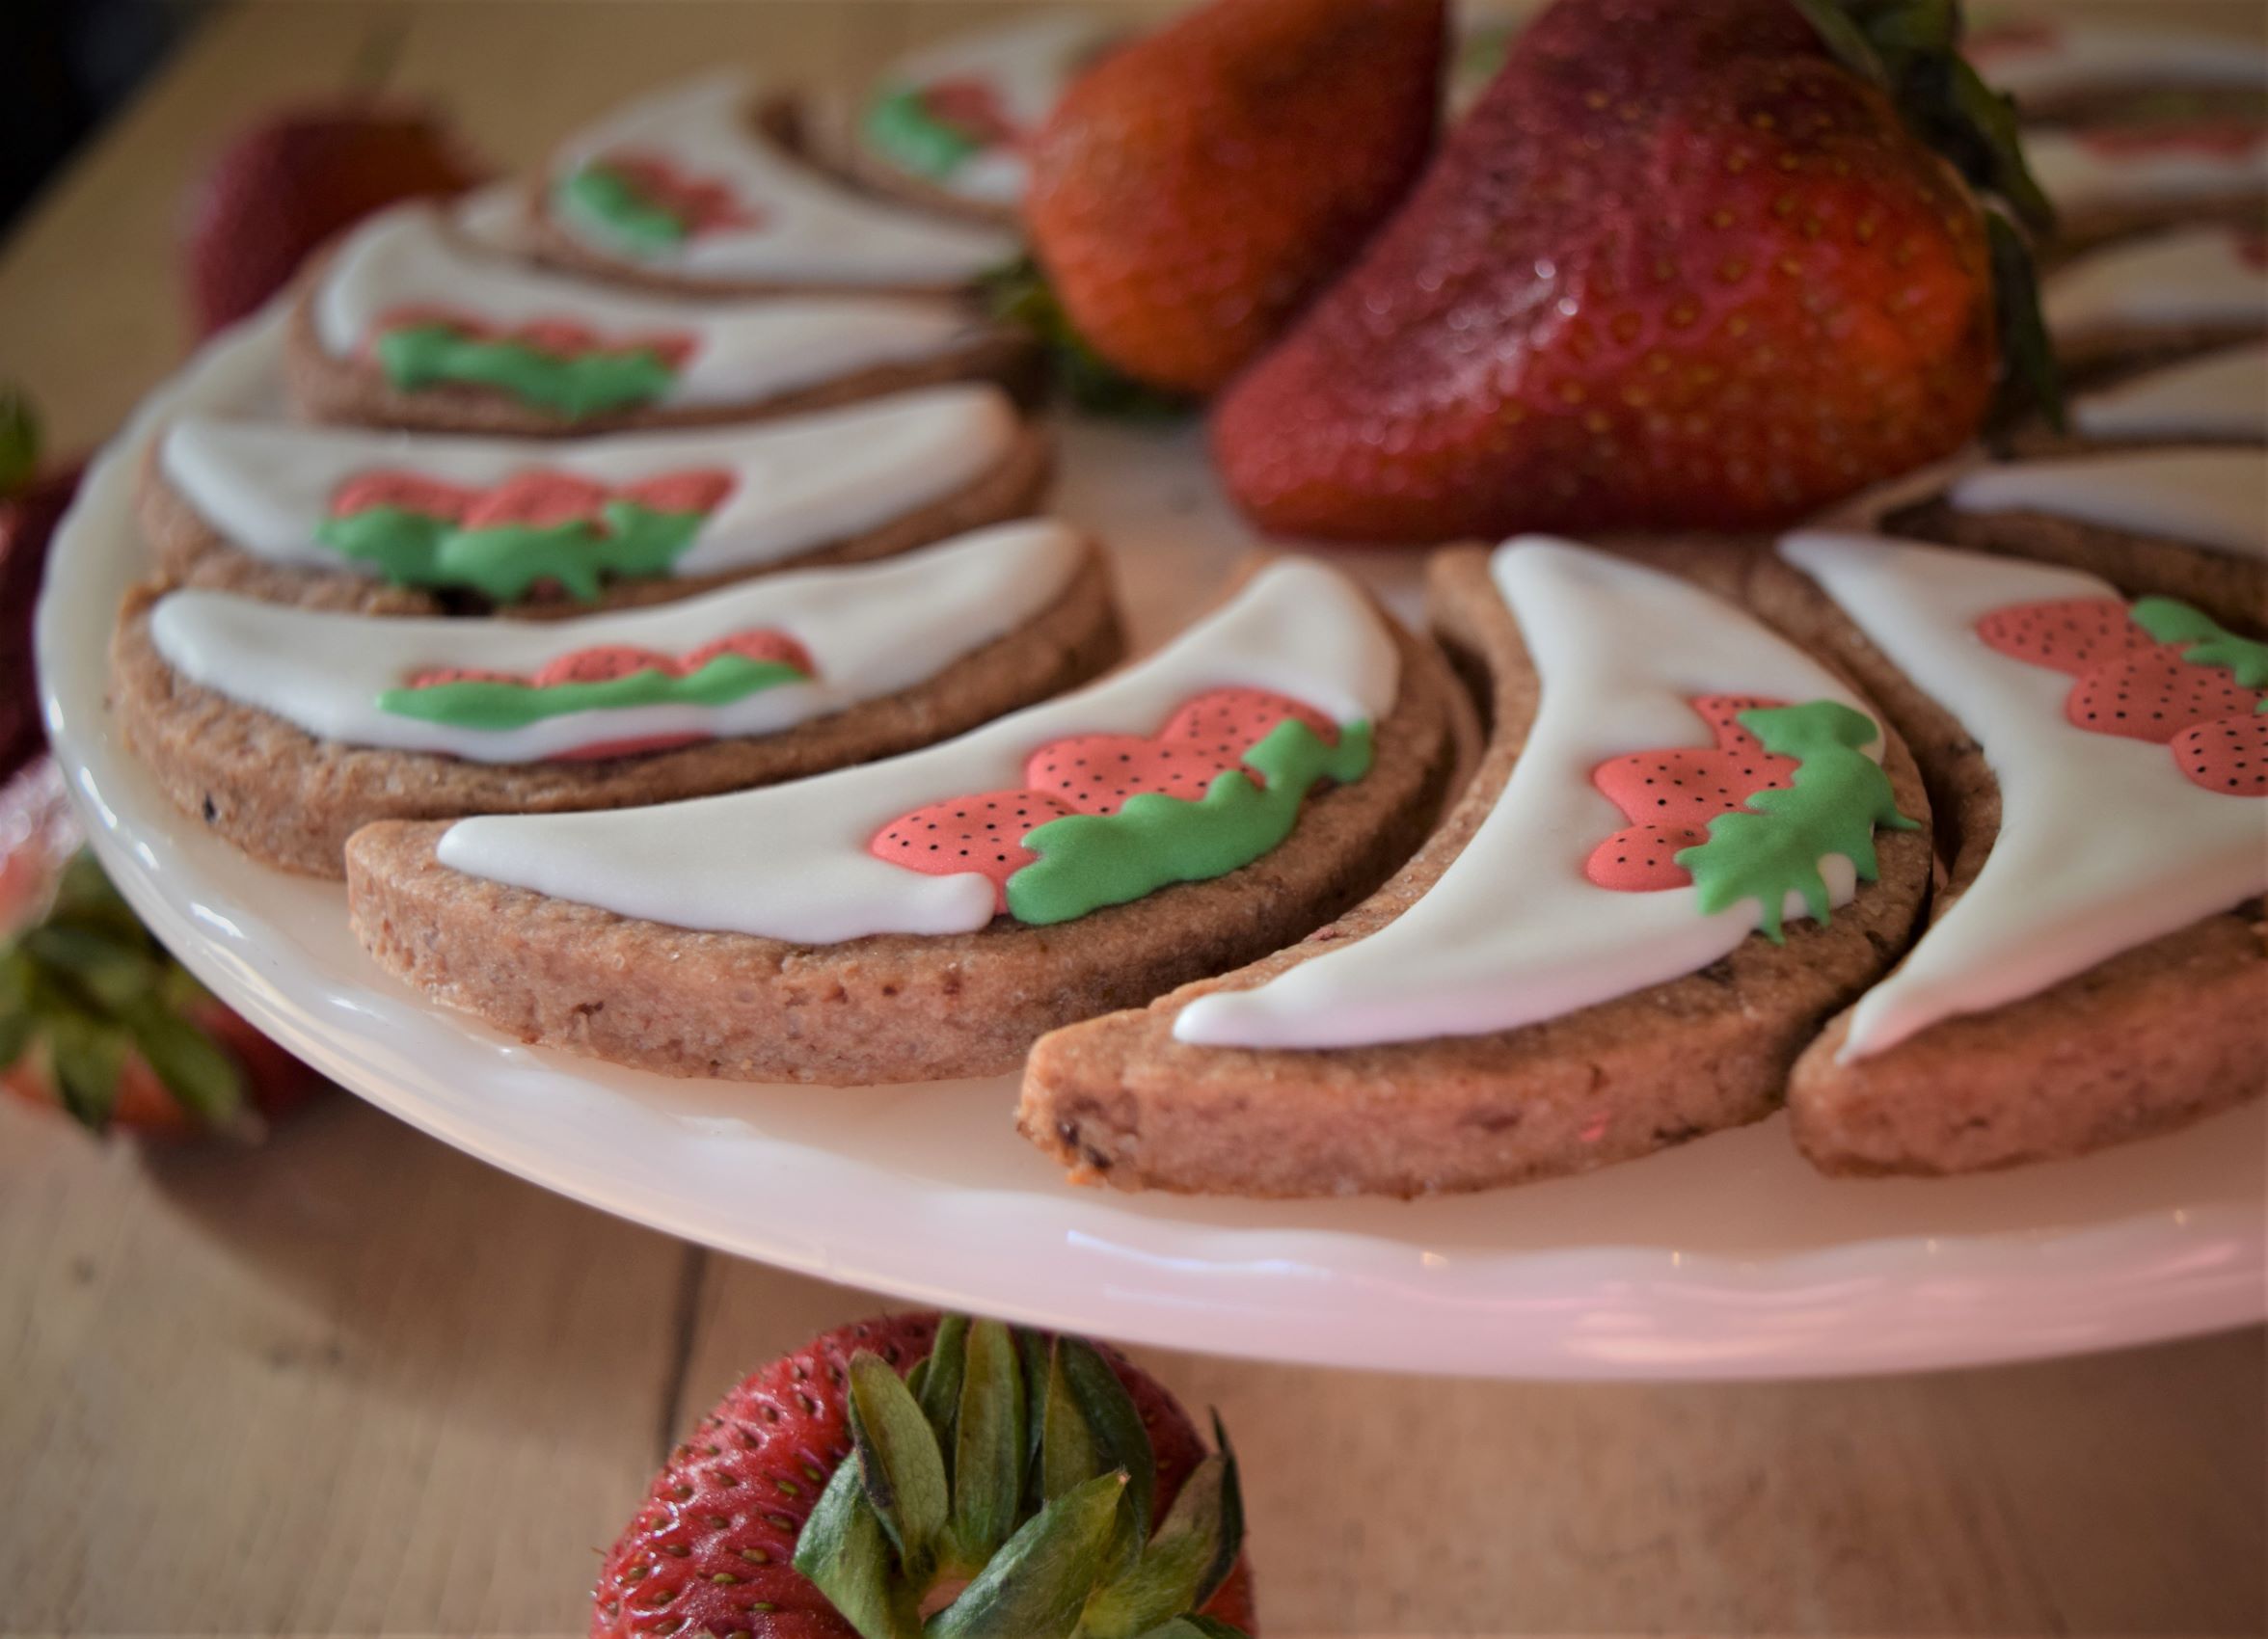
In celebration of the sweetest full moon of the year, the Strawberry Moon (June 14th), we’re baking cookies! Sweet and summery, making these Strawberry Moon Cookies with Royal Icing is a perfectly simple way to pass the afternoon.
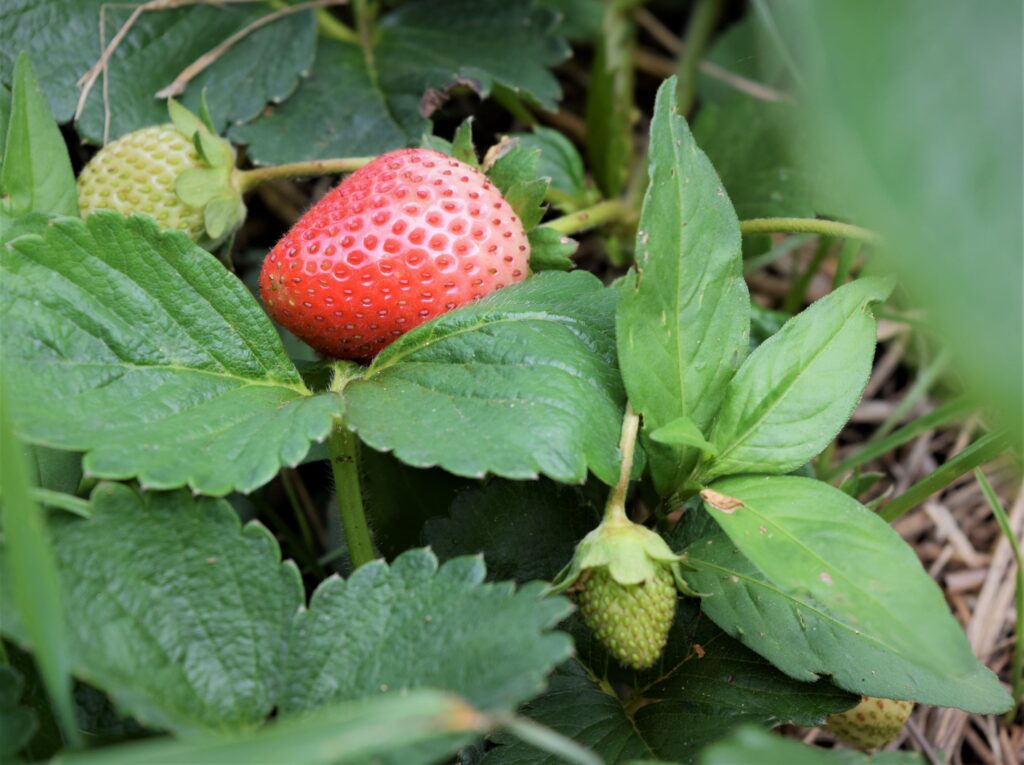
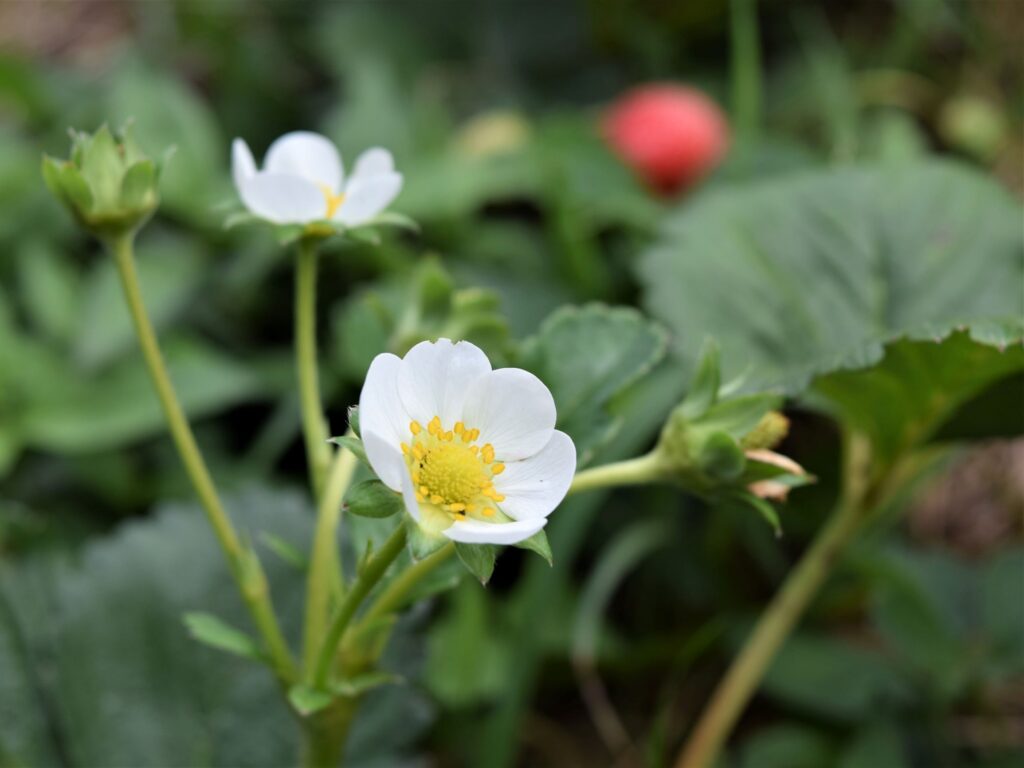
According to Native American tradition, the June full moon was called the strawberry moon because the delicious red berries ripened during this time. My little berry patch is a little late this year, so we’re just now starting to see some color! No fear though, we can still celebrate the strawberry moon with real berry flavor in our cookies!
Keeping it Real
In this recipe the delicate flavor comes from freeze-dried strawberries, crushed, and worked into the actual dough. No cloying strawberry-ish taste here! If you have a food freeze-dryer at home by all means slice up fresh berries and freeze-dry them yourself, but I found mine at Aldi.
You can purchase freeze-dried strawberries (along with freeze-dried mangoes, apples, etc.) at most grocery stores these days. You can also purchase online if your local spots don’t carry them. As a crunchy sweet snack, freeze dried fruit is a simple, portable option for travel, or just to stash in your purse. I’m absolutely addicted to the crunch!!
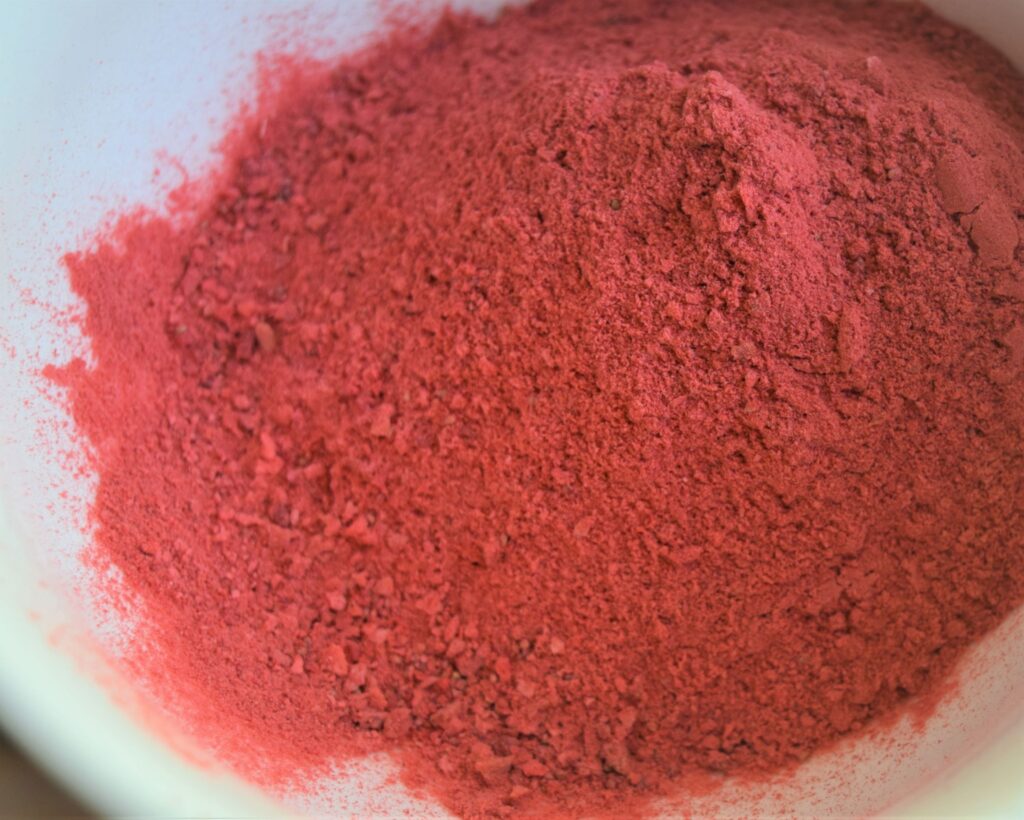
This is how the freeze-dried berries should look after pulsing them in the food processor. The strawberry dust actually holds a little moisture, so instead of mixing it with the flour, we’ll work it into the cookie dough during the wet-ingredient phase.
Mooning About
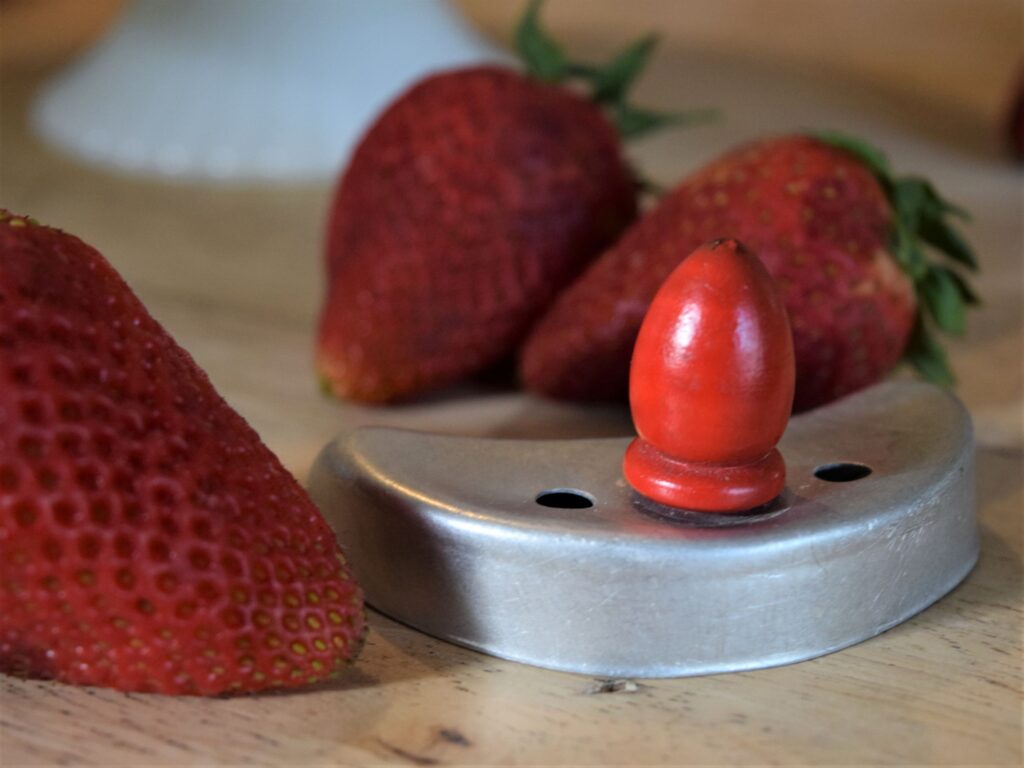
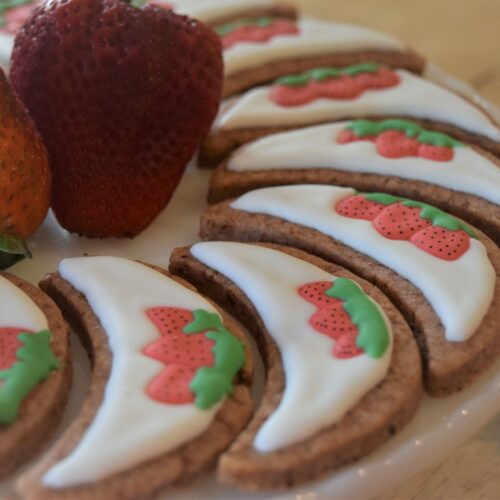
A cute, crescent-shaped vintage cookie cutter from a local antique store inspired the moon theme, but you could also use a round cutter for “full moon” shaped cookies. The Cookie Cutter Shop makes a perfect “Folk Crescent Moon” cutter that you can find right here!
Cookie Tips
Cookies turning into unrecognizable blobs in the oven? With any cookie that you’re using a cutter to shape, the trick is to roll the dough out on a piece of parchment paper, transfer it to a cookie sheet, and then to the fridge. Chill twenty minutes or so, and then cut out your cookies. Transfer cut cookies to another parchment-lined cookie sheet to bake. Your cookies will hold whatever intricate shape you want!
Keeping it Simple with Royal Icing
How thin does the icing need to be to flood a cookie? Will my piping icing hold all that flood icing in? Can I use just one icing for both jobs? The biggest mystery surrounding royal icing is undoubtably consistency. There are two basic schools of thought. One- a thick icing for piping the outside plus a thin icing for flooding. Two- a medium consistency that does double-duty. I’ve tried both methods and each work fine. However, I do prefer the one medium consistency method because its simpler. You’ll have fewer bags going and fewer color-mixing bowls. There’s so much less to keep up with! This is the method we’ll be using in the recipe below.
Getting the Perfect Consistency
When your royal icing is finished mixing it will be quite thick. To adjust the texture you’ll want to add water, a tablespoon at a time, until the desired consistency is reached. For a medium icing thickness that is strong enough for exterior piping and yet floods well, aim for a thin toothpaste consistency. If you’re going with the two-type approach, you’ll want a thick toothpaste consistency for your piping and a shampoo consistency for flooding.

I cover the basics of royal icing in my Strawberry Moon Cookie recipe below, but for a more in-depth tutorial this video is very thorough (and the sisters are fun!). Check out this video if you’re looking for a quick demo on flooding. And here’s a video or two that take royal icing to the level of edible artform! Be warned, friends, this is a seriously addictive rabbit hole to hop down!
Supplies for Cookie Decorating
I’ve found that Wilton’s cookie decorating supplies are durable and easy to use. (As usual, no affiliate links are used in this post, nor is it a sponsored post.) You can find piping bags, meringue powder, tips of every shape and size, gel food coloring- all the things- here on their site. Or pop by your local Michael’s to peruse the selection.
Have fun with this summery celebration of the Strawberry Moon! For more warm-weather desserts try my Peach Tiramisu or Bananas Foster Upside Down Cake! Happy baking!
Strawberry Moon Cookies with Royal Icing
Equipment
- Rolling Pin
- Parchment Paper
- Moon Cookie Cutter
- Stand Mixer (the icing needs to be mixed for 10 minutes)
- Icing Bags, Couplers, Ties
- Round Piping Tips #1 and #3
- Toothpick
- Black Food Color Pen
Ingredients
Dough
- 3 cups Flour
- 1 scant cup Granulated Sugar
- 2 1 oz pkg Freeze Dried Strawberries, ground into dust with food processor
- 1 stick Butter, softened
- 1 large Egg
- 2 Tbsp Half & Half
- 1 tsp Vanilla Extract
- 1/2 tsp Salt
- 1 1/2 tsp Baking Powder
Icing
- 1 lb Powdered Sugar
- 2.5 Tbsp Meringue Powder
- 1/2 tsp Cream of Tartar
- 3 oz Warm Water
- 1 tsp Vanilla Extract
- Red & Green Gel Food Coloring, if desired
Instructions
Cookies
- In a large mixing bowl cream butter and sugar together until light and fluffy. Add eggs, half & half, strawberry dust, and vanilla to bowl and mix well.
- In separate bowl combine flour, salt, and baking powder. Add this flour mixture to egg mixture a little at a time, blending between additions. Mix until dry ingredients are fully incorporated and dough holds together well.
- Separate dough into two balls. Cut two pan-sized pieces of parchment paper and place each ball on its own piece. Roll out balls to 1/4 inch thickness and transfer parchment and dough to two cookie sheets. Chill in refrigerator for twenty minutes. Preheat oven to 350 degrees F.
- Remove rolled out dough from fridge and flip onto counter. Re-line cookie sheets with fresh parchment. Cut moon shapes into the dough with your cookie cutter and transfer cut cookies to pans. Bake for 10-12 minutes or until barely brown around the edges. Cool completely before icing.
Icing
- While cookies are cooling let's make the icing! In the bowl of a stand mixer add warm water and méringue powder. Whisk by hand for about 30 seconds, or until frothy and thickened. Add cream of tartar and whisk for 30 seconds more. Add vanilla, whisk briefly, and attach bowl to stand mixer.
- Add all the powdered sugar to mixing bowl. Using a paddle attachment, mix on lowest speed for 10 minutes. Yes, 10 whole minutes. Icing will be quite thick!
- Using a rubber spatula, thin icing down with water, 1 tablespoon at a time, until a "thin toothpaste" consistency is reached. Scoop out quarter of the icing into a smaller bowl to mix in green coloring, and a second same-sized amount into a bowl to mix up your red icing.
- Using a toothpick add gel food coloring to each of the smaller bowls and stir until desired tones of red and green are reached. Assemble each icing bag with coupler and cut off the end of the bag. Affix a #3 round tip to one bag and #1 round tips to two bags. Fill the #3 tip bag with white icing and #1 tipped bags with green and red icing, respectively. Tie off bag tops with rubber ties. Line your workspace with parchment paper, gather all your tools, pile your cookies within reach, and get ready to decorate!
Decorating Cookies
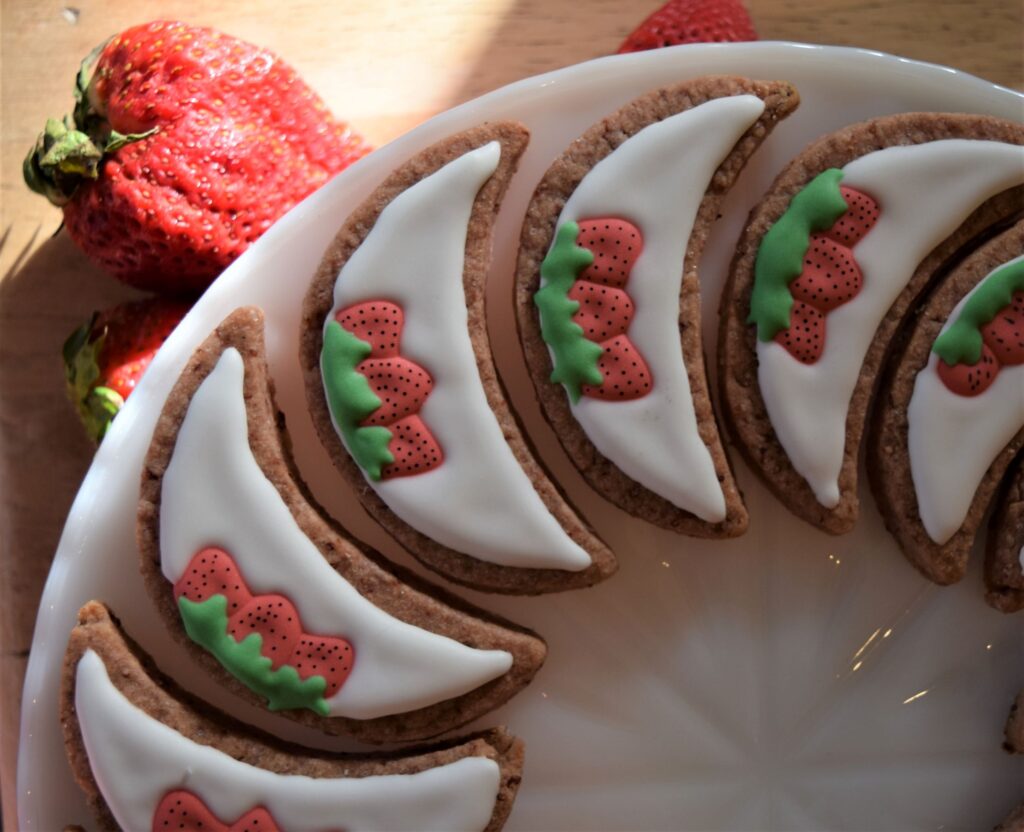
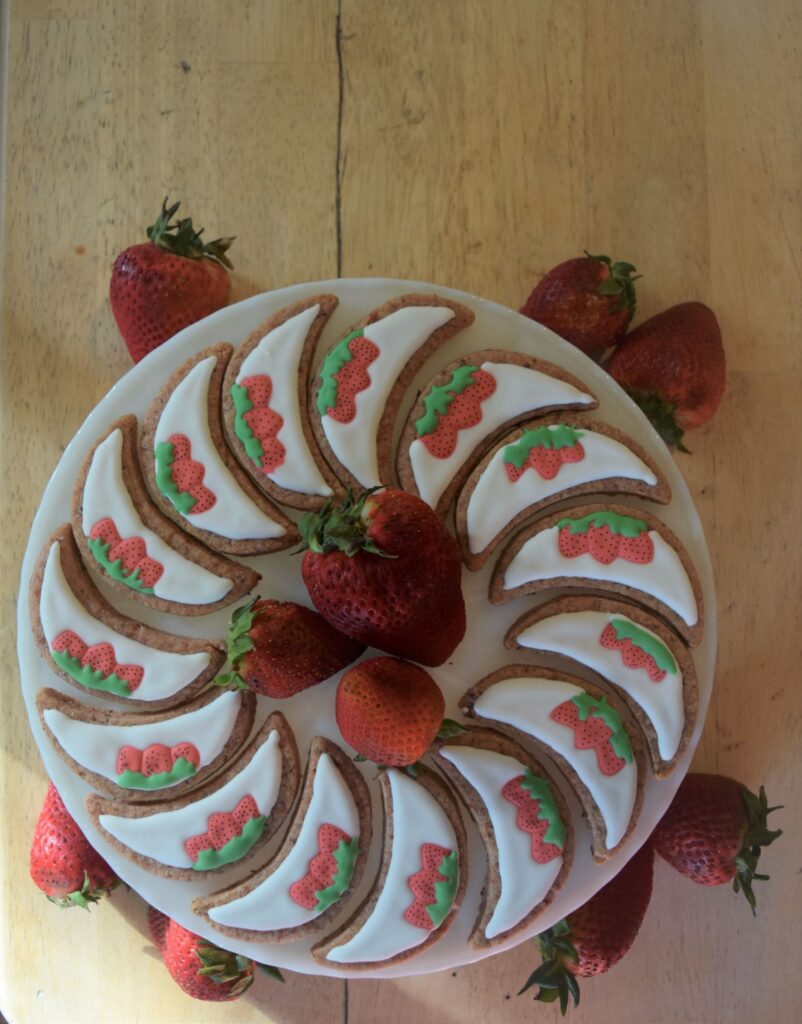
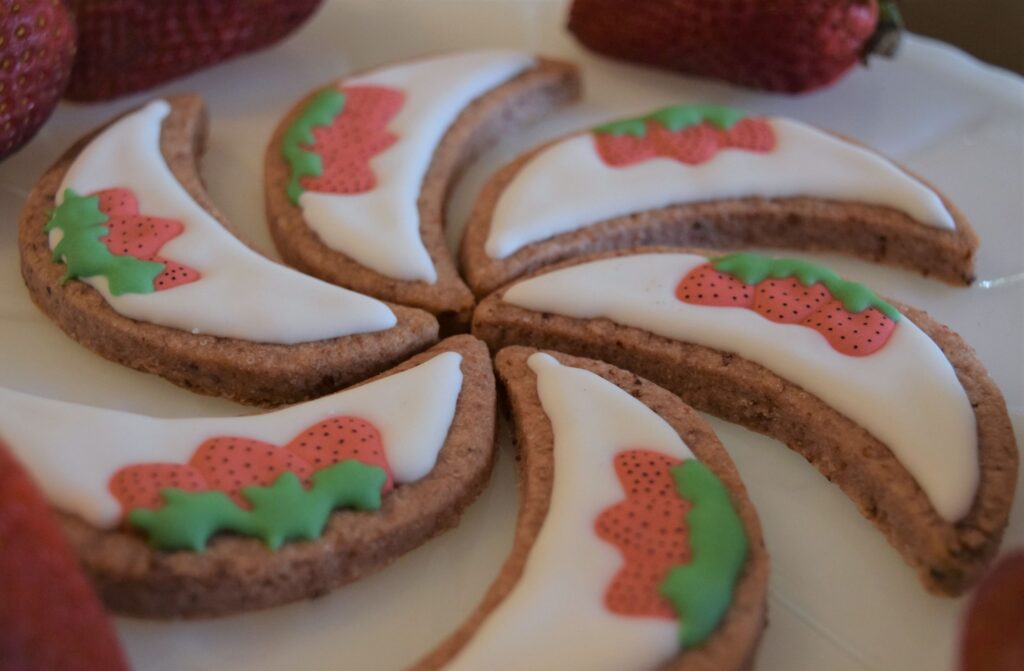
- Using steady pressure and slow movement, pipe a line with white icing around the edge of your cookie, or on parts of the cookie where you want that color. Make sure the ends of the line meet and that there are no gaps. Working back and forth, fill inside the outline or shapes with white icing. A few tiny gaps are fixable.
- Using toothpick, swirl the icing around to smooth it out and fill in any holes. Alternatively, you can pick up the cookie (being careful not to touch the icing edges) and gently shake it to settle the finish. Poke any tiny bubbles with the toothpick.
- Wait for white icing to set for about twenty minutes before adding berry shapes on top. (Option: If you'd like to experiment with wet-on-wet technique, go in with a second color immediately.) Use #1 tips to pipe triangle shapes for strawberries and squiggles for leaves. Allow to set for three hours before using food color pen to add dots (seeds!) to berries. Let dry and store in an airtight storage container. Cookies stay delicious for up to a week!
Strawberry Moon Cookies Royal Strawberry Moon Cookies Royal, Strawberry Moon Cookies RoyalStrawberry Moon Cookies Royal, Strawberry Moon Cookies Royal
Comments are closed